How does phenolphthalein function as an acid-base indicator?

Phenolphthalein functions as an acid-base indicator due to its ability to undergo a color change in response to changes in pH. It is commonly used in acid-base titrations to determine the endpoint of the reaction.

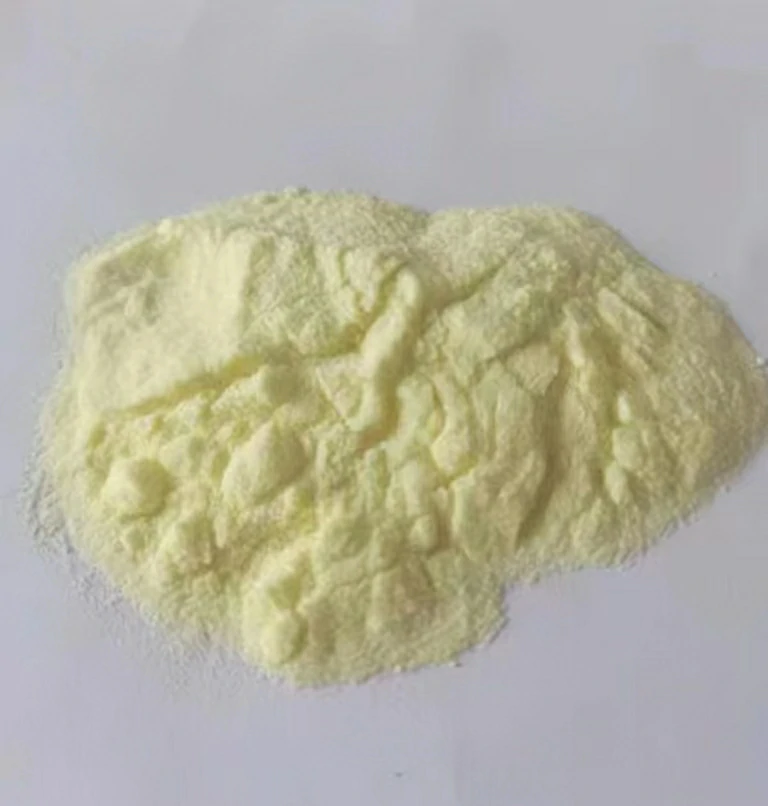
In its acidic form, phenolphthalein is colorless. As the pH increases and the solution becomes more basic, phenolphthalein undergoes a structural change that leads to a pink or magenta color. This change occurs in the pH range of approximately 8.2 to 10.0.

The color change is a result of the ionization of phenolphthalein molecules. In acidic solutions, hydrogen ions (H+) are abundant, and they react with phenolphthalein, keeping it in its colorless form. When the solution becomes basic, the hydroxide ions (OH-) react with the phenolphthalein, causing it to become ionized and exhibit a pink color.

The color change of phenolphthalein is sharp and distinct, making it useful for detecting the endpoint of an acid-base titration. The endpoint is reached when the number of moles of acid and base are stoichiometrically equal, China Phenolphthalein manufacturer resulting in a rapid change in pH and a corresponding color change of phenolphthalein.

It is important to note that phenolphthalein is not suitable for use in strongly acidic or highly concentrated basic solutions, as it may not provide accurate or visible color changes in those cases.

What are some other applications or uses of phenolphthalein outside of chemistry?

Outside of chemistry, phenolphthalein has some applications and uses in various fields. Here are a few examples:

Pharmaceuticals: Phenolphthalein has been used as a laxative in over-the-counter medications due to its stimulant effect on the intestines. However, its use in pharmaceuticals has decreased in recent years due to safety concerns.

Biology and Medicine: In biology and medicine, phenolphthalein has been used as a pH indicator in certain laboratory tests and experiments. It can help determine the pH levels of solutions or indicate the presence of alkaline substances.

Forensics: Phenolphthalein has been employed in forensic investigations, specifically in bloodstain analysis. It can be used to enhance the visibility of bloodstains by reacting with the hemoglobin present in blood, making it easier to detect and identify blood evidence.

Education and Demonstrations: Phenolphthalein is frequently used in educational settings to demonstrate acid-base reactions and the concept of pH. Its color change makes it a popular choice for teaching basic chemistry principles.

Conservation and Restoration: Phenolphthalein can be used in the field of conservation and restoration to detect the presence of alkaline substances, such as residues from previous treatments or contaminants on cultural artifacts. It helps identify areas that require further cleaning or treatment.

Water Testing: Phenolphthalein has been used in the analysis of water quality and alkalinity. It can be employed to determine the alkalinity levels of water samples, providing information about the buffering capacity and the presence of carbonates and bicarbonates.

Photography: In black and white photography, phenolphthalein has been used as a component in certain developing solutions. It can act as a pH indicator, helping to maintain the proper acidity level during the development process.

It’s worth noting that the use of phenolphthalein in some applications has declined due to safety concerns and regulatory restrictions. Additionally, it is important to consult specific guidelines and safety precautions when using phenolphthalein outside of its traditional chemistry applications.

What are the potential causes of sprocket failure or premature wear?

Several factors can contribute to sprocket failure or premature wear in an excavator undercarriage system. Here are some potential causes:

Insufficient Lubrication: Inadequate lubrication of the sprocket and the contact surfaces between the sprocket teeth and track chains can lead to increased friction, heat generation, and accelerated wear. Insufficient lubrication may result from improper lubricant selection, infrequent lubrication intervals, or failure to follow manufacturer-recommended lubrication practices.

Contamination: The presence of dirt, debris, abrasive particles, or moisture in the undercarriage system can contribute to sprocket wear. Contamination can cause abrasive action between the sprocket teeth and track chains, leading to accelerated wear and potential damage.

Improper Track Tension: Incorrect track tension can put excessive stress on the sprocket. Insufficient tension can cause the sprocket teeth to slip and wear unevenly, while excessive tension can lead to increased loads on the sprocket, accelerating wear.

Misalignment: Improper alignment of the sprocket with the track chain can result in uneven contact between the sprocket teeth and track links. Misalignment can cause concentrated wear on specific areas of the sprocket, leading to premature failure.

Overloading: Operating the excavator in conditions that exceed its recommended load capacity can put excessive stress on the sprocket. Overloading can cause accelerated wear, deformation, or even breakage of the sprocket teeth.

Poor Quality or Incorrect Sprocket Design: Low-quality materials or substandard manufacturing processes can result in weaker sprockets that are more prone to premature wear or failure. Similarly, using sprockets that are not designed specifically for the excavator model or undercarriage system can lead to compatibility issues and increased wear.

Harsh Operating Conditions: Operating the excavator in harsh environments, such as rocky terrains or highly abrasive surfaces, can accelerate sprocket wear. Additionally, extreme temperature variations, corrosive substances, or exposure to water or moisture can contribute to premature sprocket failure.

Lack of Maintenance: Inadequate or irregular maintenance practices, such as infrequent inspections, failure to address early signs of wear, or neglecting to replace worn sprockets in a timely manner, can result in accelerated wear and potential failure.

To minimize sprocket failure and premature wear, it is essential to follow proper maintenance practices, including regular lubrication, inspection for contamination, proper track tensioning, alignment checks, and prompt replacement of worn or damaged sprockets. Additionally, operating the excavator within its recommended load capacity and avoiding harsh operating conditions can help extend the sprocket’s lifespan.

What maintenance procedures should be followed to prolong the lifespan of the sprocket?

To prolong the lifespan of the sprocket in an excavator undercarriage system, it is important to follow proper maintenance procedures.

Here are some key maintenance steps that can help extend the sprocket’s lifespan:

Lubrication: Regular and proper lubrication is crucial for reducing friction and wear between the sprocket teeth and track chains. Follow the manufacturer’s recommendations for the type of lubricant to use and the recommended lubrication intervals. Ensure that the sprocket and track chain surfaces are adequately coated with lubricant.

Cleanliness: Keep the undercarriage system clean and free from dirt, debris, and other contaminants. Regularly remove any buildup of mud, rocks, or other materials that can cause abrasive action and accelerate sprocket wear. Use a pressure washer or other appropriate cleaning methods to maintain cleanliness.

Inspection: Regularly inspect the sprocket for signs of wear, damage, or misalignment. Look for uneven wear patterns, excessive tooth wear, cracks, or missing teeth. CATERPILLAR CAT320 Excavator Undercarriage Part Sprocekt manufacturer Inspect the sprocket teeth and track chain contact surfaces for signs of excessive wear or damage. Detecting and addressing issues early can prevent further damage and extend the sprocket’s lifespan.

Track Tension: Maintain proper track tension according to the manufacturer’s recommendations. Incorrect track tension can put unnecessary stress on the sprocket, leading to accelerated wear. Regularly check and adjust the track tension as needed to ensure optimal performance and minimize sprocket wear.

Alignment: Check the alignment of the sprocket with the track chain. Misalignment can result in uneven wear and premature sprocket failure. If misalignment is detected, consult the manufacturer’s guidelines or seek professional assistance to correct the alignment.

Replacement: Monitor the sprocket’s wear condition and replace it when necessary. Worn sprockets can cause increased wear on the track chains and other undercarriage components. Follow the manufacturer’s recommendations or consult with a qualified technician to determine the appropriate timing for sprocket replacement based on wear limits.

Operating Practices: Adopt proper operating practices to minimize stress on the sprocket. Avoid overloading the excavator beyond its recommended capacity, and operate in a manner that minimizes impacts, sudden direction changes, and excessive spinning of the tracks, which can contribute to sprocket wear.

Documentation: Keep a record of maintenance activities, including lubrication schedules, inspections, adjustments, and replacements. This documentation helps track the maintenance history and aids in identifying patterns or issues that may arise over time.

By following these maintenance procedures, you can effectively care for the sprocket and maximize its lifespan, ensuring optimal performance and reducing the risk of premature wear or failure.

Which is the recommended Venturi Fertilizer Mixer Injectors for a drip irrigation system?

There are various Venturi fertilizer mixer injectors available in the market that can be used with a drip irrigation system. The choice of a specific Venturi injector depends on factors such as the flow rate of your irrigation system, the type of fertilizer or chemical you intend to inject, and the specific requirements of your crop or plants. Here are a few popular Venturi fertilizer mixer injectors commonly used in drip irrigation systems:

Mazzei Injectors:

Mazzei injectors are widely recognized for their high-quality performance. They offer a range of models suitable for different flow rates and applications. Mazzei injectors are known for their durability, reliability, and efficient mixing action.

Dosatron Injectors:

Dosatron injectors are another popular choice for drip irrigation systems. They are available in a variety of sizes and configurations to accommodate different flow rates. Dosatron injectors are known for their accuracy, ease of installation, and precise dosing capabilities.

MixRite Injectors:

MixRite injectors are commonly used for injecting fertilizers, chemicals, or other additives into drip irrigation systems. They offer a range of models suitable for various flow rates and applications. MixRite injectors are known for their simplicity, reliability, and ease of maintenance.

Irritec Venturi Injectors:

Irritec offers a range of Venturi injectors designed specifically for use in drip irrigation systems. Their injectors are available in different sizes and flow rates to suit various application needs. Irritec Venturi injectors are known for their efficiency and uniform mixing performance.

When selecting a Venturi fertilizer mixer injector, consider the following factors:

Flow Rate: Choose an injector that matches the flow rate of your irrigation system. This ensures proper mixing and injection of fertilizers or additives.

Injector Size: Select an injector size that can accommodate the required flow rate and pressure range of your system.

Chemical Compatibility: Check the compatibility of the injector material with the fertilizers or chemicals you plan to inject. Ensure that the injector is suitable for the specific application and chemicals you intend to use.

Maintenance and Serviceability: Consider the ease of maintenance and availability of spare parts for the injector. Look for injectors that are easy to clean, inspect, and service when necessary.

It’s recommended to consult with irrigation suppliers, manufacturers, or professionals who can provide guidance and recommend the most suitable Venturi fertilizer mixer injector for your specific drip irrigation system and requirements.

How is the tactile feedback and responsiveness of a custom rubber keypad achieved?

The tactile feedback and responsiveness of a custom rubber keypad are achieved through the design and construction of the keypad itself.

Here are the key factors that contribute to the tactile feedback and responsiveness:

Button Design: The shape, size, and contour of the buttons on the rubber keypad play a significant role in providing tactile feedback. Raised or domed buttons are commonly used to create a distinct tactile sensation when pressed. The design may include features such as texturing or ridges to enhance the feel and grip.

Actuation Force: The actuation force required to activate a button determines the responsiveness of the keypad. It refers to the amount of force needed for the button to make contact and register an input. The actuation force can be adjusted by the design of the rubber material and the underlying mechanism.

Snap Ratio: The snap ratio is the difference in force required between the initial press and the point at which the button fully actuates. It contributes to the tactile feel by providing a noticeable “snap” or click sensation when the button is pressed.

Domes or Switches: Rubber keypads often incorporate dome-shaped structures made of metal or conductive rubber beneath each button. When pressed, these domes collapse, making contact with the underlying circuitry to register the input. custom rubber keypad The choice of dome materials and their specifications (e.g., size, shape, and force characteristics) affects the tactile feedback.

Conductive Materials: Custom rubber keypads may use conductive materials in the button construction to ensure reliable electrical contact when pressed. These materials can affect the tactile feel and responsiveness by influencing the force required for actuation.

Backlighting: Backlighting can be incorporated into the rubber keypad design to enhance visibility and provide visual feedback. Illuminated buttons can contribute to the overall user experience and complement the tactile feedback.

It’s worth noting that achieving the desired tactile feedback and responsiveness often involves a balance between factors like actuation force, snap ratio, durability, and user preferences. Custom rubber keypad manufacturers use their expertise and knowledge of materials and design principles to tailor these characteristics to meet specific requirements and user expectations.

How is a custom rubber keypad designed and manufactured to meet specific requirements?

Designing and manufacturing a custom rubber keypad involves several steps to meet specific requirements. Here is a general overview of the process:

Requirement Analysis: The first step is to gather and analyze the specific requirements for the custom rubber keypad. This includes understanding the desired functionality, performance characteristics, dimensions, button layout, and any special features or customization requirements.

Design Concept: Based on the requirements, design concepts for the rubber keypad are developed. This includes creating a visual representation of the keypad layout, button shapes, and any additional elements such as icons or graphics. Computer-aided design (CAD) software is often used in this stage.

Material Selection: The appropriate rubber material is chosen based on factors such as durability, electrical conductivity (if required), chemical resistance, and environmental conditions. The material selection is critical to meet the desired tactile properties, longevity, and performance of the keypad.

Prototype Development: A prototype of the custom rubber keypad is created to evaluate the design, functionality, and tactile feedback. This step allows for testing and refinement before moving to mass production. Prototypes can be produced using various methods, including silicone molding or 3D printing.

Tooling and Molding: Once the design is finalized, the manufacturing process begins. Tooling, which includes creating molds for the rubber keypad, is developed. The molds are typically made from steel or other suitable materials. The molds are precision machined to match the desired keypad design.

Rubber Keypad Production: The selected rubber material is injected or compression molded into the prepared molds. The rubber material is carefully cured to achieve the desired physical properties. The production process includes bonding any additional components such as conductive contact domes, backlighting elements, or connectors.

Quality Control: Stringent quality control measures are implemented throughout the manufacturing process. This includes inspecting the raw materials, monitoring the molding process, and conducting tests on samples from the production run. Various tests are performed, including dimensional checks, electrical conductivity tests, and tactile feedback evaluations.

Customization and Finishing: After the rubber keypads are molded, additional customization options are implemented based on requirements. This can include printing icons, symbols, or labeling using methods like screen printing or laser etching. Color matching, texturing, or surface coatings can also be applied to achieve the desired aesthetics and functionality.

Assembly and Integration: If necessary, the rubber keypads are assembled with other components or integrated into the target device or product. This can involve attaching connectors, cables, or interface components.

Final Inspection and Packaging: The completed rubber keypads undergo a final inspection to ensure they meet the specified requirements and quality standards. Once approved, they are packaged and prepared for shipment to the customer.

Throughout the entire process, collaboration between the customer and the rubber keypad manufacturer is crucial to ensure that the design, functionality, and performance align with the specific requirements and expectations.

How frequently should excavator rollers be inspected and maintained?

The frequency of inspection and maintenance for excavator rollers can depend on several factors, including the operating conditions, intensity of equipment usage, and the manufacturer’s recommendations.

Here are some general guidelines to consider:

Daily Inspections: Perform a visual inspection of the excavator rollers before each use. Look for any signs of wear, damage, or misalignment. Check for loose or missing components such as bolts or seals.

Regular Maintenance: In addition to daily inspections, regular maintenance should be performed at specified intervals. The specific timeframe can vary, but a common recommendation is to perform maintenance every 250 to 500 operating hours or every three to six months, whichever comes first.

Lubrication: Follow the manufacturer’s guidelines for lubricating the excavator rollers. Proper lubrication helps reduce friction and wear. Lubrication requirements may differ based on the type of lubricant used and operating conditions. Generally, lubrication should be performed at regular intervals, typically after a certain number of operating hours or as specified by the manufacturer.

Environmental Considerations: If the excavator operates in harsh or extreme conditions, such as dusty environments or areas with high moisture levels, more frequent inspections and maintenance may be necessary to prevent accelerated wear and damage to the rollers.

Manufacturer’s Recommendations: Refer to the excavator’s operation and maintenance manual for specific recommendations from the manufacturer regarding inspection and maintenance intervals. Manufacturers often provide detailed guidelines based on their equipment’s design and specifications.

It’s important to note that these are general guidelines, and the specific maintenance requirements may vary based on the excavator model and manufacturer. Adhering to the manufacturer’s recommended maintenance schedule and promptly addressing any issues identified during inspections will help ensure optimal performance, longevity, and safety of the excavator rollers.

What materials are commonly used in the construction of excavator rollers?

Excavator rollers, also known as track rollers or bottom rollers, are typically constructed using durable and wear-resistant materials to withstand the demanding operating conditions of construction equipment. The specific materials used can vary depending on the manufacturer and the intended application.

Here are some commonly used materials in the construction of excavator rollers:

Steel: Steel is one of the most common materials used for excavator rollers. It offers excellent strength, durability, and resistance to wear and impact. High-quality alloy steels are often employed to provide enhanced hardness and toughness.

Cast Iron: Cast iron is another material used in the construction of excavator rollers. It possesses good wear resistance and can withstand heavy loads and harsh operating conditions. China excavator roller Cast iron rollers are often used in larger excavators.

Forged Steel: Forged steel is a type of steel that has undergone a forging process to enhance its strength and durability. Excavator rollers made from forged steel exhibit excellent resistance to bending, breaking, and wear.

Polyurethane: In some cases, excavator rollers may feature a polyurethane coating or inserts. Polyurethane provides good wear resistance and helps reduce noise and vibration during operation. It is commonly used in applications where reduced noise and improved traction are desired.

It’s worth noting that the specific combination of materials and their composition can vary depending on the manufacturer, design specifications, and the specific requirements of the excavator model. Manufacturers often optimize the materials used in excavator rollers to achieve a balance between strength, durability, and cost-effectiveness.

Proper selection and quality of materials are crucial for ensuring the longevity and performance of excavator rollers under challenging operating conditions. Manufacturers typically provide guidelines and specifications for the materials used in their equipment, and it’s important to follow their recommendations for replacement or repair purposes.

The Ultimate Guide to Adult Baby Under Bed Pads: Everything You Need to Know

Adult baby under bed pads, also known as adult changing pads or waterproof bed pads, are essential products for individuals who wear adult diapers or have incontinence needs. They offer protection, comfort, and convenience. In China Adult Baby Under Bed Pad supplier guide, we’ll cover everything you need to know about adult baby under bed pads, including their benefits, features, usage tips, and maintenance guidelines.

Benefits of Adult Baby Under Bed Pads:

Protection: Under bed pads provide a waterproof barrier that protects mattresses and bedding from leaks, spills, or accidents, ensuring a clean and hygienic sleeping environment.
Comfort: The soft and absorbent materials used in under bed pads keep the user’s skin dry and comfortable, minimizing the risk of irritation or discomfort.
Convenience: These pads offer a convenient solution for managing incontinence. They are easy to use, maintain, and transport, making them suitable for home use or travel.

Features of Adult Baby Under Bed Pads:

Waterproof Barrier: Under bed pads have a waterproof or moisture-resistant backing that prevents liquids from penetrating through to the mattress or bedding.
Absorbent Core: The absorbent layer quickly absorbs and locks away moisture, keeping the user dry and reducing the risk of leaks or odors.
Soft and Comfortable: Under bed pads are made with soft, skin-friendly materials that provide a comfortable sleeping surface.
Various Sizes and Shapes: They come in different sizes and shapes to accommodate different bed sizes and user needs.
Odor Control: Many pads incorporate odor-control features to minimize unpleasant smells.

Usage Tips for Adult Baby Under Bed Pads:

Proper Placement: Place the under bed pad on top of the fitted sheet or directly on the mattress, ensuring it covers the area most susceptible to leaks.
Secure the Pad: Some pads come with straps or flaps to secure them in place, preventing movement during sleep.
Layering: For added protection, consider using multiple under bed pads layered on top of each other.
Travel Use: Under bed pads are portable and can be used on sofas, chairs, or other furniture to provide protection while traveling or in different settings.

Maintenance Guidelines:

Washing Instructions: Follow the manufacturer’s washing instructions, which usually involve machine washing with mild detergent and tumble drying on low heat. Avoid using bleach or fabric softeners, as they can degrade the pad’s performance.
Stain Removal: Promptly treat any stains with an appropriate stain remover before washing to maintain the pad’s cleanliness and appearance.
Regular Replacement: Over time, under bed pads may experience wear and tear. It’s advisable to periodically inspect them and replace as needed to ensure optimal performance.

Remember, under bed pads are just one component of a comprehensive incontinence management routine. It’s essential to consult with healthcare professionals to determine the best approach for your specific needs and to explore other available products, such as adult diapers or protective underwear, if necessary.

By understanding the benefits, features, usage tips, and maintenance guidelines for adult baby under bed pads, you can make informed decisions to enhance comfort, protect bedding, and manage incontinence effectively.